
Assembling the Guitar
To assemble the guitar the completed Rim is installed in the Universal Mold face down. The Back is then glued on. When the glue has cured the open body is then taken out and re-installed with the Back down. A thin coat of shellac is applied inside to the Sides, the Back and the (yet) unattached Top as a moisture barrier. Then the Top is glued on. Next the bindings are installed and the body sanded smooth. Then the Neck is carefully fitted to the Body and glued on. Then the Fingerboard is made, fretted and glued on. The final assembly step is the gluing of the Bridge. All these steps require great precision.
Gluing the Back to the Rim
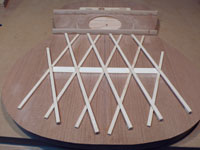
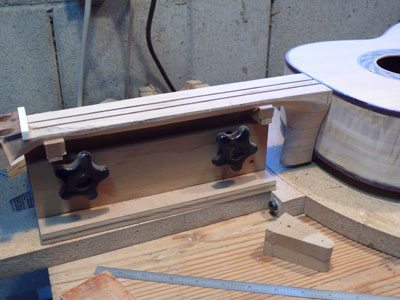
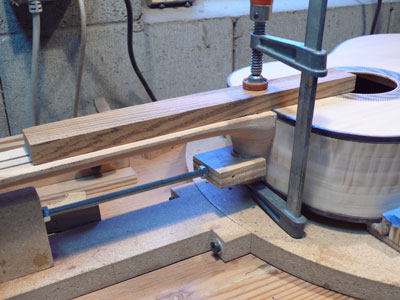
 The
vertical posts of the Universal Mold are not only used to define the
outline of the guitar, they are also used to clamp the Back or the Top
to the Rim for gluing. Each posts has a screw-in threaded rod and a
larger diameter cork-padded disk that is pressed down with a wing nut
during the gluing process.
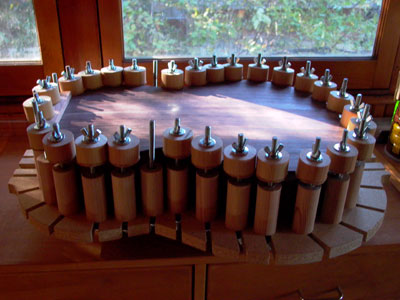
The
vertical posts of the Universal Mold are not only used to define the
outline of the guitar, they are also used to clamp the Back or the Top
to the Rim for gluing. Each posts has a screw-in threaded rod and a
larger diameter cork-padded disk that is pressed down with a wing nut
during the gluing process.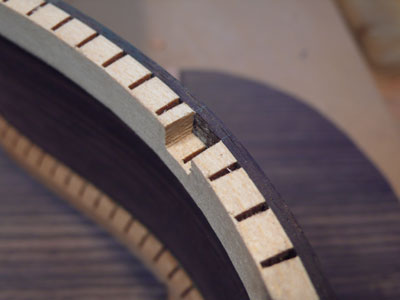 Prior
to gluing the Back it is precisely positioned over the Rim, and the
positions of the bracings are marked on the kerfing. The kerfings are
then slotted to accommodate the ends of the bracings, and the bracings
are cut off to fit into these slots. This will greatly strengthen the
body.
Prior
to gluing the Back it is precisely positioned over the Rim, and the
positions of the bracings are marked on the kerfing. The kerfings are
then slotted to accommodate the ends of the bracings, and the bracings
are cut off to fit into these slots. This will greatly strengthen the
body.Gluing the Top to the Rim
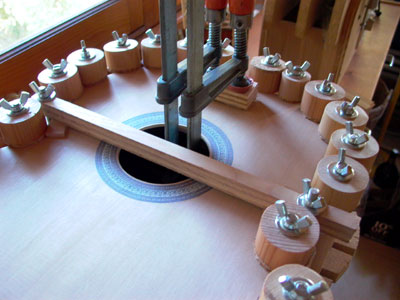 The
process for gluing on the Top is the same as for the back. The Top is
first aligned on the Rim to mark where the cross-braces fit into the
kerfing. Then the kerfings are slotted as shown above, and then the Top
is glued and clamped in the same way as the Back was before.
The
process for gluing on the Top is the same as for the back. The Top is
first aligned on the Rim to mark where the cross-braces fit into the
kerfing. Then the kerfings are slotted as shown above, and then the Top
is glued and clamped in the same way as the Back was before.Installing the Lining
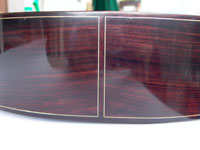
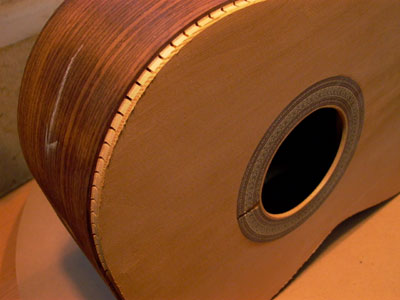 The
lining is a strip of hardwood installed along the edges between the Rim
and the Top and the Rim and Back. Often this is made from the same wood
as the Sides, but it can also be different for color accent. In general
the lining includes several veneer strips of different color to give
the lining a distinctive look. This is called purfling. To prepare for
the lining and purfling a rabbet is
cut into the Rim along the edges of the Top and the Back as shown.
The
lining is a strip of hardwood installed along the edges between the Rim
and the Top and the Rim and Back. Often this is made from the same wood
as the Sides, but it can also be different for color accent. In general
the lining includes several veneer strips of different color to give
the lining a distinctive look. This is called purfling. To prepare for
the lining and purfling a rabbet is
cut into the Rim along the edges of the Top and the Back as shown.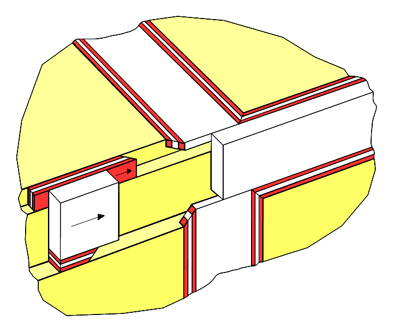 The
joints of the lining and purfling strips at the back inlay are tricky
and need to be done with great care.
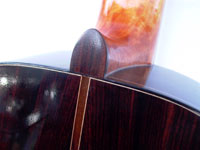
The
joints of the lining and purfling strips at the back inlay are tricky
and need to be done with great care.
and gluing it
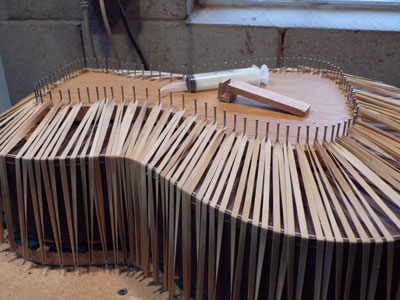 Before
the linings are
glued in they need to be shaped to the curvature of the Rim. I do this
in the bending machine, same as for the Sides. To obtain
a tight fit the linings are pressed into the rabbet during gluing. This
is accomplished using a fixture consisting of two parts, one on the top
and one on the bottom of the Body studded with nails and a large number
of rubber bands between them as shown.
Before
the linings are
glued in they need to be shaped to the curvature of the Rim. I do this
in the bending machine, same as for the Sides. To obtain
a tight fit the linings are pressed into the rabbet during gluing. This
is accomplished using a fixture consisting of two parts, one on the top
and one on the bottom of the Body studded with nails and a large number
of rubber bands between them as shown.Gluing the Neck to the Body
 The
Neck needs to be precisely joined to the Body. Key points in the
geometry are the Nut, the Saddle and the 12th fret. Not only do they
need to be on the centerline of the guitar, but the triangle these
points form must allow for the correct string action height. Contrary
to the Steel String Guitar the Neck of the Classical Guitar does not
contain a so-called truss rod which allows height adjustments of the
neck.
The
Neck needs to be precisely joined to the Body. Key points in the
geometry are the Nut, the Saddle and the 12th fret. Not only do they
need to be on the centerline of the guitar, but the triangle these
points form must allow for the correct string action height. Contrary
to the Steel String Guitar the Neck of the Classical Guitar does not
contain a so-called truss rod which allows height adjustments of the
neck.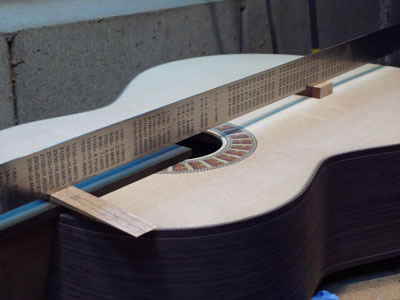 Once
the correct position of the neck has been established the Neck/Body fit
of the heel needs to be carefully achieved with chisels and sandpaper.
Once
the correct position of the neck has been established the Neck/Body fit
of the heel needs to be carefully achieved with chisels and sandpaper.

 The
gluing and clamping is rather simple.
The
gluing and clamping is rather simple.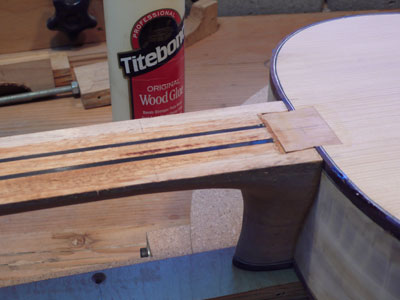 Note
the double
carbon fiber strip in the center of the Neck which stiffens the Neck to
reduce Neck bending as a result of the string tension.
Note
the double
carbon fiber strip in the center of the Neck which stiffens the Neck to
reduce Neck bending as a result of the string tension. There
are many ways to to make the Fingerboard and to glue it to the
Neck/Body. My preferred way is to fit the unfretted Fingerboard to the
Neck/Body, then to cut the fret slots, then to install and dress the
frets and then to glue on the Fingerboard. Others glue on the slotted
and fitted Fingerboard before fretting it in place. I have also
glued the finished fretted Fingerboard to the Neck before
gluing the Neck to the Body. Each approach has its pros and cons, and I
will continue to experiment until I settle on the best approach.
There
are many ways to to make the Fingerboard and to glue it to the
Neck/Body. My preferred way is to fit the unfretted Fingerboard to the
Neck/Body, then to cut the fret slots, then to install and dress the
frets and then to glue on the Fingerboard. Others glue on the slotted
and fitted Fingerboard before fretting it in place. I have also
glued the finished fretted Fingerboard to the Neck before
gluing the Neck to the Body. Each approach has its pros and cons, and I
will continue to experiment until I settle on the best approach.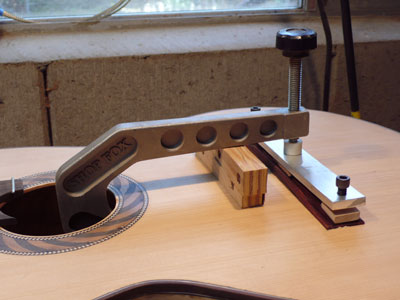 The
Bridge can be glued on either before or after the Top has a finish on
it. What is more important is its precise position relative to the 12th
fret, the center point of the string length. The distance between the
front edge of the Saddle and the center of the 12th fret is the same as
the distance between the Nut and center of the 12th fret with a 2.5mm
compensation added at the Saddle. Note that the bottom of the Bridge
has a curvature to
match the Top's . Also, for the gluing process a caul is used on the
inside to allow the Bridge to be clamped against.
The
Bridge can be glued on either before or after the Top has a finish on
it. What is more important is its precise position relative to the 12th
fret, the center point of the string length. The distance between the
front edge of the Saddle and the center of the 12th fret is the same as
the distance between the Nut and center of the 12th fret with a 2.5mm
compensation added at the Saddle. Note that the bottom of the Bridge
has a curvature to
match the Top's . Also, for the gluing process a caul is used on the
inside to allow the Bridge to be clamped against.